Scott Townley
Bridgewater, NJ
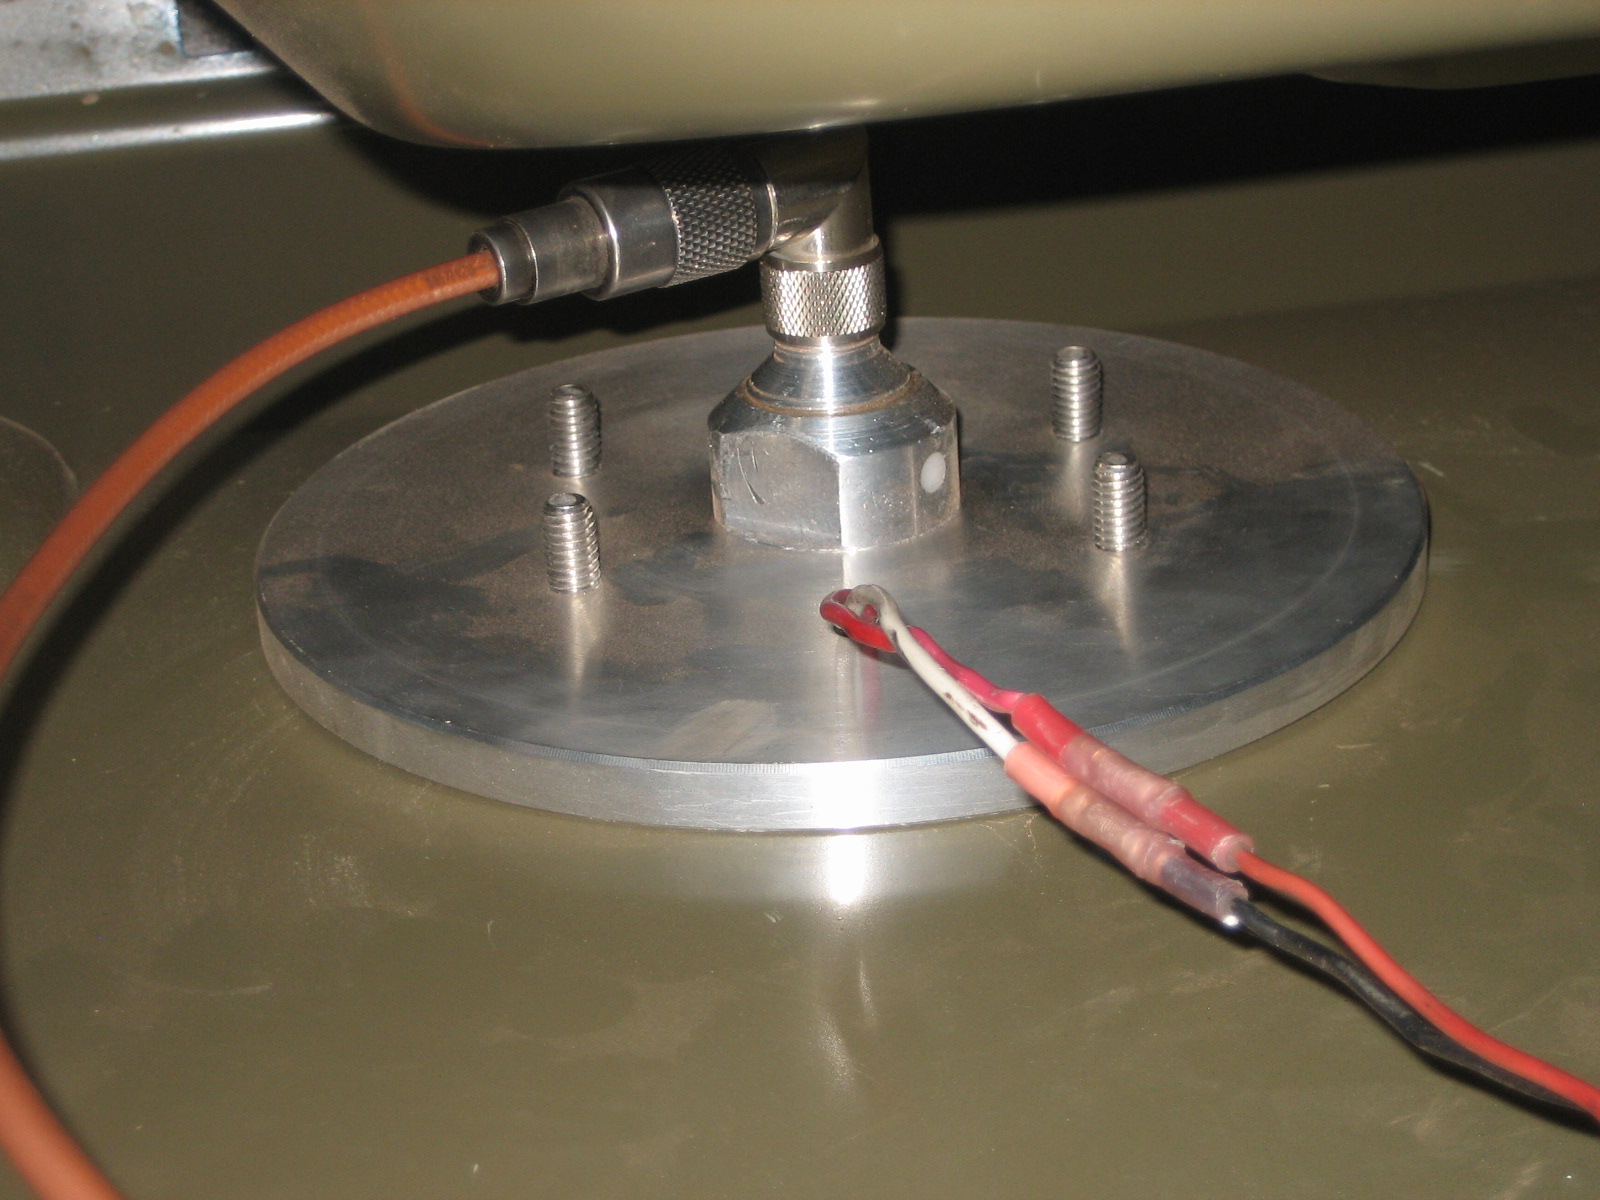
The High Sierra HS-1800 is attached to the Tundra using a Breedlove Machine Shop combo backing plate-flattop ball mount-SO239 connector assembly. Mine is a bit different from the one Jerry advertises as the backing plate (on the other side of the sheet metal) is almost 8" in diameter, and this unit has a 6-hole mounting pattern rather than 4-hole.
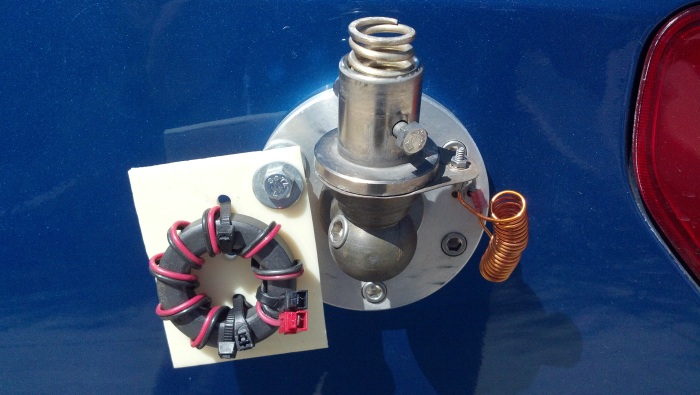
The FT-240-43 toroid is mounted on a piece of ABS plastic, and is stood off using one of the mount's bolts. The other end of the motor wire goes into one of the bolt holes (I just left the bolt out--used 5 instead of 6 in the actual mounting).
The HS-1800 comes with a brass insert in the bottom (this is the brass piece right below the black antenna tube). This insert extends about 2" into the antenna tube and is normally conically bored to match the High Sierra mounting bracket (which I recommend, by the way...it just wouldn't fit the frame arrangement of this truck). I had Jim at High Sierra make me a new insert that was drilled and tapped 3/8"x24. That way I could use the Giant Hi-Q Quick Disconnect.
The small coil on the right is for matching on 80 meters. The idea is to tune the antenna a little "short" (so it's capacitive), then a bit of shunt-L will tune pretty close to 50 ohms. The ball and the GQD are all RF-hot, so I inserted a very thin piece of copper flash to connect the shunt coil.
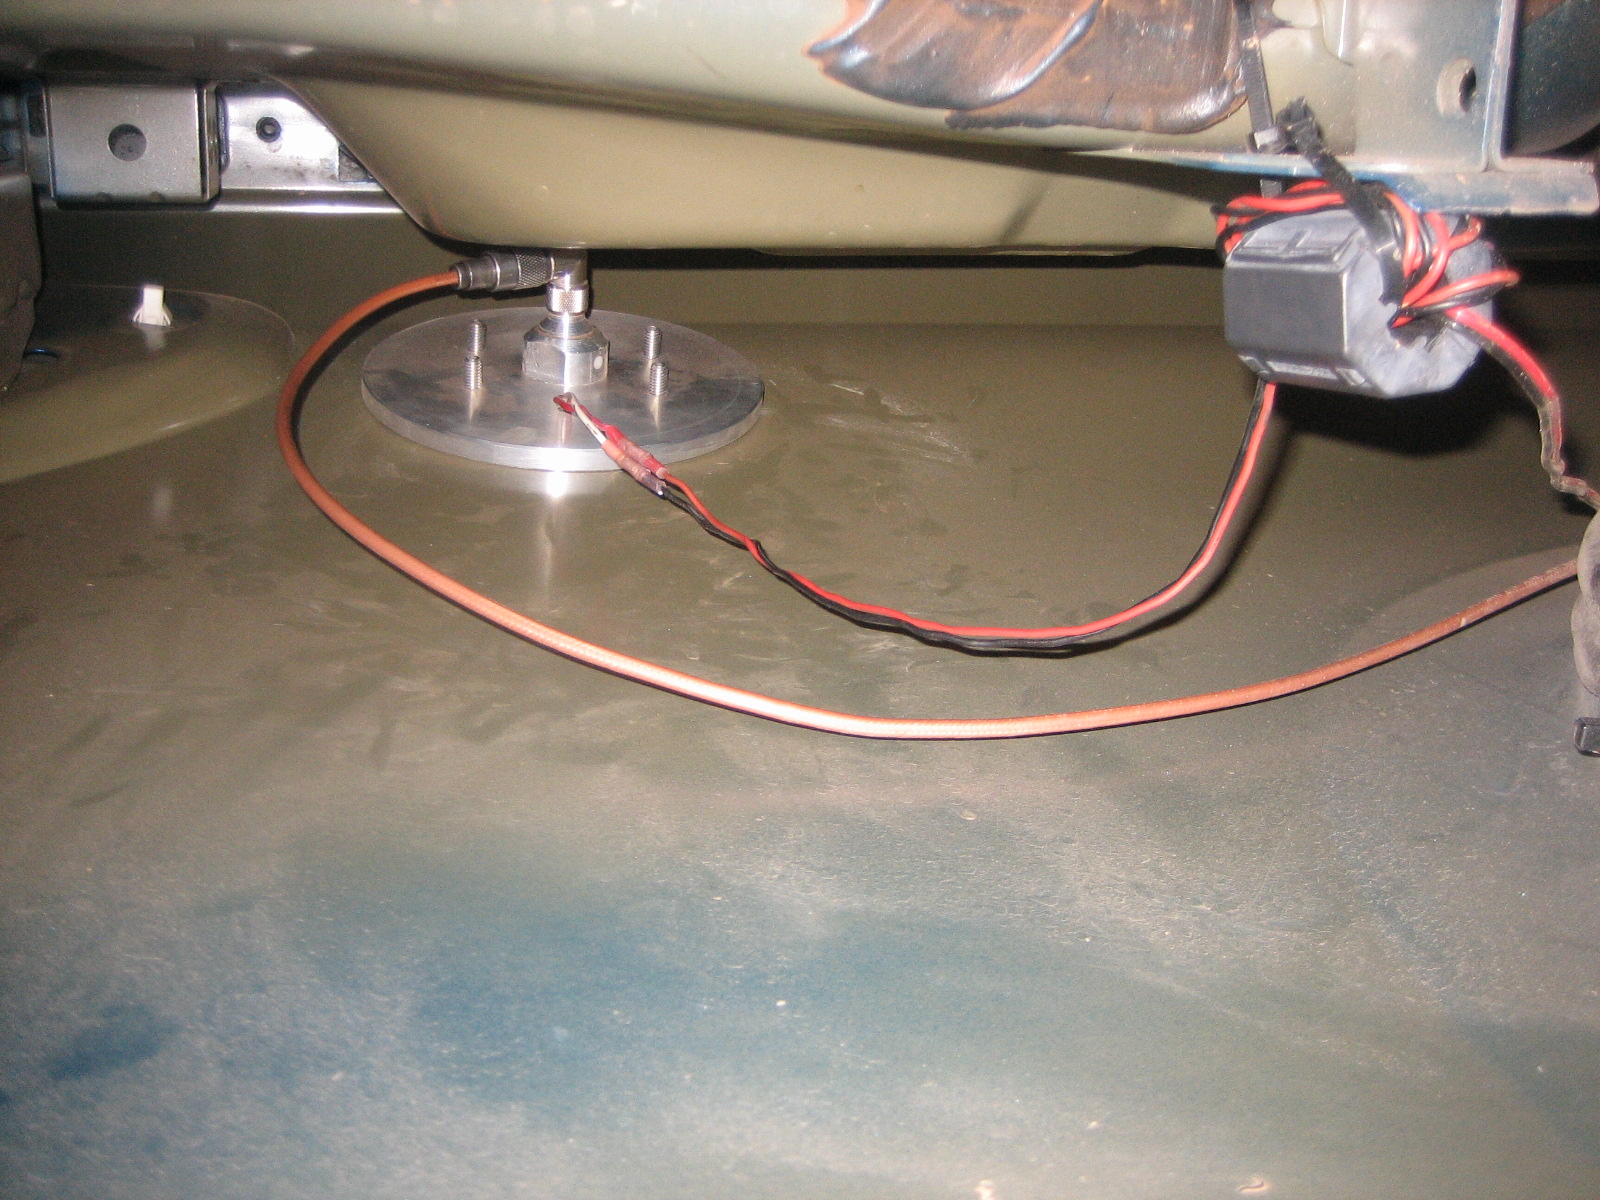
Here is the backside of the Breedlove mount. Note that this plate is about 1" larger radius (compare the bolt patterns). The red/white wire is the continuation of the DC control line. I just left one of the 6 hex bolts out to pass the DC control line through the body.
Before assembling the mount, I sanded the surface of the sheet metal with a 3" wire brush, down to bare shiny metal. Then I used some copper impregnated goop between the body metal and the mount (Butternut used to sell it as "Butter-it's-not").
NOTE: The metal on the top of the picture is the inside of the truck bed. I nearly screwed myself badly by not accounting for the length of the mount connector and the right angle adapter, plus the fact that the mount connector has a length of bolt extending (to attach to the ball mount on the other side). I nearly wasn't able to fit the connector in the center hole because of the length of the bolt, and after narrowly accomplishing that I almost couldn't put the right angle connector on! In retrospect I should have put the mount maybe 2" lower on the vehicle body. But I was trying to get it as high as I could off the ground.
Same view, just zoomed back. The square bracket and hole in the upper left is the bottom of the bed stake pocket (left rear corner of the bed). The DC control line is wrapped in a snap-together Mix 31 ferrite core before travelling to the cab.